How to Clean Commercial Kitchen Floors Step by Step
Table of Contents
- Why Cleaning Commercial Kitchen Floors Matters: Safety, Hygiene and Compliance
- What You’ll Need: Essential Equipment and Cleaning Chemicals
- Step-by-Step Process: How to Clean Commercial Kitchen Floors Daily
- Deep Cleaning Commercial Kitchen Floors: When and How
- Understanding COSHH for Cleaning Chemicals in Commercial Kitchens
- Commercial Kitchen Cleaning Regulations UK and HACCP Cleaning Schedules
- Maintaining Different Floor Types in Commercial Kitchens
- Common Mistakes to Avoid When Cleaning Commercial Kitchen Floors
Last Updated: July 26, 2026
Why Cleaning Commercial Kitchen Floors Matters: Safety, Hygiene and Compliance
Commercial kitchen floor cleanliness directly impacts staff safety, food hygiene compliance, and business protection. Grease, food particles, and moisture accumulate rapidly, creating slip hazards that lead to workplace injuries and potential litigation. The Health and Safety Executive (HSE) regularly cites wet floors and poor housekeeping as contributing factors in workplace accidents. Contaminated floors harbour bacteria and pathogens that compromise food safety. Environmental Health Officers conducting HACCP inspections expect documented cleaning schedules, appropriate chemical use, and evidence of effective floor maintenance. Failing these inspections results in enforcement action, reputational damage, and lost business.
Commercial kitchen floors accumulate three distinct types of soil: loose debris (food scraps, dust), greasy residue (cooking oils, fat splatter), and biofilm (bacterial growth in grout and crevices). Each requires different treatment. Sweeping alone won’t remove grease. Water alone won’t eliminate bacteria. The correct sequence, debris removal, pre-treatment, chemical application, rinsing, and proper drying, separates compliant kitchens from those heading toward problems.
What You’ll Need: Essential Equipment and Cleaning Chemicals
Daily Cleaning Tools and Equipment
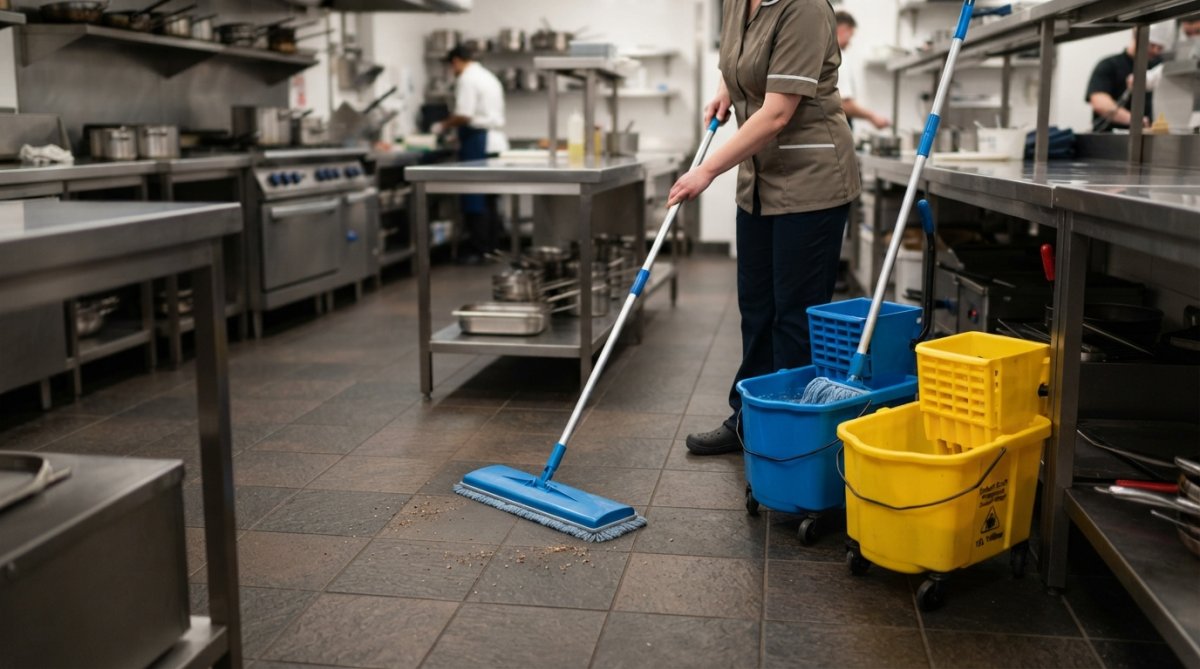
The foundation of any commercial kitchen floor cleaning operation is a good mop and bucket system. The Abbey Kentucky Mop Bucket Kit features a 25-litre capacity with an integrated wringer, professional-grade aluminium handle, and two absorbent mop heads. The wringer mechanism allows staff to remove excess water quickly, reducing puddles and slip hazards whilst ensuring the mop remains wet enough to lift dirt effectively.
Colour-coded equipment prevents cross-contamination between different areas. A Colour Coded Socket Mop Kit in your chosen colour (available in blue, green, red, and yellow) ensures kitchen floor cleaning equipment never gets mixed up with restroom or general area cleaning tools. This separation is essential for food safety compliance.
You’ll also need a stiff-bristled push broom for initial debris removal and the Abbey Yellow Wet Floor Sign (double-sided, 640mm) to alert staff and visitors to hazards during and after cleaning. Position signs at entry points and at regular intervals around the cleaned area.
Deep Cleaning Equipment and Degreasers
Weekly or fortnightly deep cleaning requires equipment that tackles built-up grease and biofilm. A wet/dry vacuum removes water and debris efficiently. Floor scrubbing machines apply consistent pressure and chemical contact, achieving results that manual mopping cannot match.
Alkaline degreasers break down cooking oils and fat deposits through saponification, converting oils into water-soluble compounds that rinse away. Most commercial kitchen degreasers operate at pH 11-13 and require dilution according to manufacturer instructions. Enzyme-based cleaners complement alkaline products by breaking down protein-based soils (blood, meat residue, dairy). Acid-based cleaners remove mineral deposits and burnt-on residue, typically used on grout and heavily soiled areas rather than as all-over floor treatments. Discounted Cleaning Supplies stocks a comprehensive range of commercial cleaning supplies suitable for all these applications.
Step-by-Step Process: How to Clean Commercial Kitchen Floors Daily
Step 1: Sweep and Remove Debris
Begin every cleaning session by removing loose debris. This prevents wet cleaning from turning food particles and dirt into a slurry that smears across the floor. Use a stiff-bristled broom to sweep all areas, paying particular attention to corners, under equipment, and along base walls where debris accumulates.
Pay special attention to grout lines. Food particles wedge into grout, providing a breeding ground for bacteria. Sweep grout lines vigorously or use a small hand brush for heavily soiled areas. Ensure debris doesn’t accumulate around drain covers, these areas trap food waste and create odour problems if left unattended.
Step 2: Pre-treat Grease and Food Particles
Once loose debris is removed, spray or apply your chosen degreaser to heavily soiled areas. Alkaline degreasers work best when they have time to chemically break down grease, typically 5-15 minutes depending on the product and severity of soiling. Check the product label for recommended dwell time.
Work in sections, treating the worst-affected areas first. This prevents the chemical from drying out before you can mop. In kitchens with deep-fat fryers or griddles, the surrounding floor will need more aggressive pre-treatment than areas away from cooking equipment.
For stubborn, burnt-on residue, a stiff-bristled brush helps break up the deposit whilst the chemical is working. Scrubbing in circular motions is more effective than back-and-forth, as it dislodges material from multiple angles.
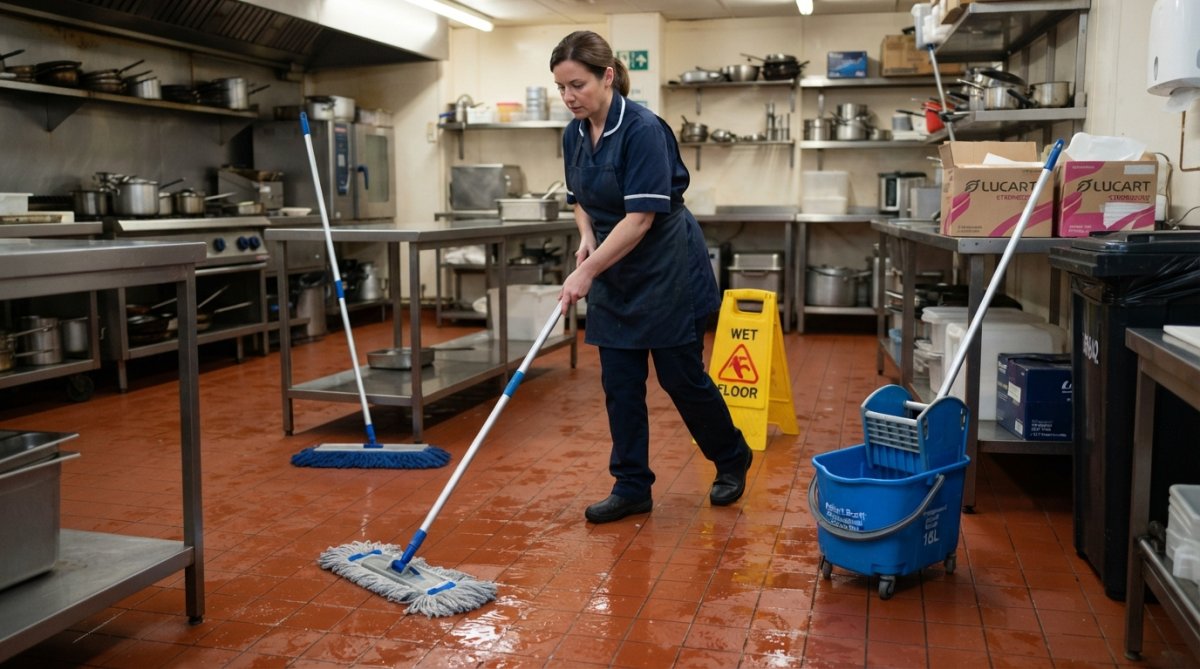
Step 3: Mop with Appropriate Cleaning Solution
Fill your mop bucket with hot water; heat accelerates chemical action and helps dissolve grease more effectively than cold water. Add your chosen cleaning solution at the dilution ratio specified on the product label. Incorrect dilution is a common mistake: too weak and the cleaner won’t work; too strong and you’ll waste product and potentially damage floor surfaces.
Immerse your mop head in the solution, then use the wringer to remove excess liquid. The mop should be wet but not dripping. Mop in overlapping strokes, working from the back of the kitchen toward the exit. Pay extra attention to high-traffic areas where grease and food particles concentrate. Change your mop water when it becomes visibly dirty or greasy.
Step 4: Rinse, Dry and Prevent Slip Hazards
Rinsing removes cleaning chemical residue, essential for both safety and surface protection. Fill your mop bucket with clean water and mop the entire floor again using the same systematic approach. For thorough rinsing, consider a second rinse pass if the water becomes noticeably discoloured.
Drying is critical for slip prevention. Use clean microfibre mop heads or squeegees to remove standing water. Microfibre absorbs water more efficiently than traditional cotton, leaving floors drier in less time. For large areas, a wet/dry vacuum removes water quickly and thoroughly. Ensure all water is removed from grout lines and corners, as these areas retain moisture and remain slippery even when the main floor appears dry.
Place wet floor signs strategically during the drying phase.
Deep Cleaning Commercial Kitchen Floors: When and How
Deep cleaning should occur weekly in busy kitchens, fortnightly in moderate-use kitchens, and monthly in light-use kitchens. Deep cleaning follows the same sequence as daily cleaning but with more aggressive chemical treatment and longer dwell times. Use a floor scrubbing machine if available, or work in smaller sections with extra scrubbing effort using a stiff brush.
For deep cleaning, consider using a stronger alkaline degreaser dilution (following the product’s maximum recommended concentration) and allowing extended dwell time of 20-30 minutes for heavily soiled floors. Don’t leave chemical on the floor so long that it dries, as this makes rinsing difficult and can damage grout.
Allow the floor to dry completely before returning the kitchen to service, typically 30-60 minutes depending on ventilation, floor type, and ambient humidity. Plan deep cleaning sessions outside peak kitchen operating hours.
Understanding COSHH for Cleaning Chemicals in Commercial Kitchens
The Control of Substances Hazardous to Health (COSHH) Regulations 2002 require employers to assess and manage risks from hazardous chemicals. Every cleaning product must have a Safety Data Sheet (SDS), which provides information on hazards, safe handling, and emergency procedures.
Alkaline degreasers, acid cleaners, and disinfectants can cause skin and eye irritation or, in concentrated form, chemical burns. Staff must wear appropriate personal protective equipment (PPE): gloves, eye protection, and in some cases respiratory protection depending on the product and ventilation. Your COSHH assessment must identify which PPE is required for each product.
Dilution is a critical control measure. Always dilute according to the product label and never mix cleaning chemicals, as some combinations create toxic gases. Store all cleaning chemicals in a designated, locked area away from food and food contact surfaces. Labels must remain intact and legible. Staff must understand basic emergency procedures for chemical contact with skin or eyes, and how to respond to spills.
Commercial Kitchen Cleaning Regulations UK and HACCP Cleaning Schedules
Health and Safety Standards
The Health and Safety at Work etc. Act 1974 places a general duty on employers to ensure, so far as reasonably practicable, the health, safety, and welfare of employees, including maintaining safe floor conditions. Environmental Health Officers conducting food safety inspections expect to see evidence of effective cleaning. The Food Safety Act 1990 and Food Hygiene Regulations 2006 (as amended) require food businesses to maintain clean premises. Inspectors look for documented cleaning schedules, evidence of implementation (cleaning logs), and staff competence in safe cleaning practices.
Building Your HACCP Cleaning Schedule
HACCP (Hazard Analysis and Critical Control Points) is a systematic approach to food safety that includes cleaning and sanitation as critical control points. Your HACCP cleaning schedule should document what is being cleaned, when cleaning occurs, how it’s cleaned (method, chemicals used, equipment), who is responsible, and how cleaning effectiveness is verified.
For commercial kitchen floors, this typically means:
- Daily mopping with appropriate cleaning solution
- Weekly deep cleaning with degreaser
- Monthly deep clean with acid treatment for grout
- Documented records of each cleaning session
Keep cleaning logs for at least two years. These records demonstrate compliance if inspected and help identify patterns suggesting your cleaning approach needs adjustment for particular zones.
Maintaining Different Floor Types in Commercial Kitchens
Quarry Tile and Ceramic Tile Floors
Quarry tile is popular in commercial kitchens because it’s durable and provides good slip resistance when properly maintained. However, its porous nature means it absorbs grease and bacteria if not cleaned thoroughly. Grout lines are particularly problematic, trapping moisture, grease, and biofilm, creating ideal conditions for bacterial growth and odours.
When cleaning quarry tile, alkaline degreasers work effectively, but ensure thorough rinsing to prevent residue buildup. Acid-based cleaners used occasionally (monthly or quarterly) help remove mineral deposits and restore grout appearance. Avoid using acid cleaners too frequently, as they can damage grout over time.
Ceramic tile is less porous than quarry tile and generally easier to clean. The same cleaning approach applies. A key maintenance point for both tile types is preventing grease buildup in grout lines through regular brushing during cleaning.
Concrete Floors
Concrete is porous and absorbs grease readily. Unsealed concrete floors in commercial kitchens are particularly problematic because grease penetrates deep into the surface, creating permanent staining and harbouring bacteria. Consider applying a food-safe sealer, which creates a barrier that prevents absorption and makes subsequent cleaning much easier.
For sealed concrete, standard alkaline degreasers work well. For unsealed concrete, you may need stronger degreaser concentrations and longer dwell times. Concrete floors develop cracks and spalling (flaking) with heavy use. These areas trap moisture and grease, creating hygiene problems. Repair damaged concrete promptly, as cracks also create trip hazards and make mopping less effective.
Common Mistakes to Avoid When Cleaning Commercial Kitchen Floors
Using water alone without appropriate cleaning chemicals. Water removes loose debris but doesn’t break down grease or kill bacteria. Always use an appropriate cleaning product, alkaline degreaser for oily soils, acid cleaner for mineral deposits, and disinfectant if required by your HACCP plan.
Applying cleaning solution and immediately mopping without dwell time. Chemicals need time to chemically break down soil. Follow the product label’s recommended dwell time, typically 5-15 minutes for degreasers.
Skipping the rinse stage. Residual cleaning chemical left on the floor creates slip hazards and can damage floor surfaces. Always rinse thoroughly with clean water after chemical application.
Leaving standing water on the floor. Wet floors are slip hazards and prevent the kitchen from returning to service promptly. Dry floors thoroughly using squeegees, microfibre mops, or wet/dry vacuums.
Mixing cleaning chemicals. Some combinations create toxic reactions. Never mix alkaline cleaners with acid cleaners. When in doubt, rinse thoroughly between different products.
Not addressing grout and corners. These areas accumulate grease and biofilm that regular mopping misses. Use a brush to actively clean grout lines and corners during both daily and deep cleaning sessions.
Using the same mop water for the entire kitchen. Mop water becomes dirty quickly in commercial kitchens. Change water when it becomes visibly dirty or greasy, typically 2-3 times per cleaning session in a busy kitchen.
Inadequate staff training. Staff need to understand why each step matters, how to use chemicals safely, and how to recognise when cleaning is effective. Invest time in training and provide written instructions for different floor types and soil conditions.
Recommended Products
Maintaining commercial kitchen floors to food safety standards requires systematic, documented cleaning using appropriate equipment and chemicals. Discounted Cleaning Supplies stocks everything needed for effective commercial kitchen floor cleaning, with free UK delivery on all orders and access to over 8,000 cleaning products.
The Abbey Kentucky Mop Bucket Kit offers reliable daily cleaning capability with its integrated wringer mechanism and professional-grade construction, making it ideal for busy commercial kitchens requiring consistent, efficient mopping.
The Colour Coded Socket Mop Kit prevents cross-contamination through proper colour separation, ensuring kitchen floor cleaning equipment remains dedicated to food preparation areas and never gets mixed with restroom or general area cleaning tools.
The Abbey Yellow Wet Floor Sign (double-sided, 640mm) provides essential slip hazard communication, flipping between “Caution Wet Floor” and “Cleaning in Progress” messaging to alert staff and visitors during and immediately after cleaning.
By following the step-by-step process outlined above and avoiding common mistakes, your kitchen will maintain the cleanliness standards that health inspectors expect and that your staff and customers deserve.
Frequently Asked Questions
What is the best way to deep clean a commercial kitchen floor?
Deep cleaning commercial kitchen floors involves a thorough process beyond daily mopping. First, sweep all debris and pre-treat stubborn grease with an alkaline degreaser, allowing appropriate dwell time for the chemical to break down soils. Use a floor scrubber or scrubbing machine with hot water and cleaning solution to agitate the surface, then rinse thoroughly with clean water using a wet/dry vacuum to remove all moisture. Pay particular attention to grout lines, floor drains and corners where food particles accumulate. This process should be scheduled weekly or fortnightly depending on kitchen traffic and food preparation intensity.
How often should commercial kitchen floors be cleaned, and what is a HACCP cleaning schedule?
Commercial kitchen floors require daily cleaning at minimum, with additional deep cleaning on a scheduled basis. A HACCP cleaning schedule documents when, how and by whom each cleaning task is completed, creating a record for health inspectors. Daily cleaning should occur during and after service hours; deep cleaning typically happens weekly. The schedule must specify which cleaning chemicals are used, dilution ratios, contact times (dwell time), and who is responsible. This documentation protects your business by demonstrating compliance with food safety regulations and helps identify any gaps in cleaning procedures.
What cleaning products should I use for commercial kitchen floors, and what is COSHH?
Select cleaning products based on your floor type and soil type. Alkaline cleaners work well for grease and food residues; acid-based cleaners tackle mineral deposits; pH-neutral cleaners suit delicate surfaces. COSHH (Control of Substances Hazardous to Health) regulations require you to assess chemical risks, provide safety data sheets, use appropriate dilution ratios, and ensure staff are trained in safe handling. Always follow manufacturer dilution instructions and allow adequate dwell time for the chemical to work effectively. Never mix cleaning chemicals, as this creates dangerous reactions. Keep all product labels, safety data sheets and staff training records accessible for health inspectors.
What equipment do I need to clean commercial kitchen floors properly?
Essential daily cleaning equipment includes a broom, mop, mop bucket with wringer, squeegee, and wet floor signs. For effective cleaning, invest in a colour-coded mop system to prevent cross-contamination between areas. Deep cleaning requires a floor scrubber, hot water extraction equipment or wet/dry vacuum, and appropriate degreasers. Safety equipment such as non-slip mats, anti-fatigue mats for staff, and wet floor signage are critical for slip prevention. Having the right equipment reduces cleaning time, improves results, and helps maintain compliance with health and safety standards. Quality equipment also lasts longer, making it a cost-effective investment for busy commercial kitchens.